Angular Reactive Form Example
In this post, we will create an example of an Angular Reactive form.
We start by executing the following command on a terminal windows.
The command will create the "angular-reactive-form-example" folder
ng new angular-reactive-form-example
Lets then proceed to open the folder.
cd angular-reactive-form-example
Angular Component
Create the TestForm component with the following command
ng generate component TestForm
And update the content of the following two files: test-form/test-form.component.ts, and test-form/test-form.component.html.
src/app/test-form/test-form.component.ts
import { Component, OnInit } from '@angular/core';
import { FormBuilder } from '@angular/forms';
@Component({
selector: 'app-test-form',
templateUrl: './test-form.component.html',
styleUrls: ['./test-form.component.css']
})
export class TestFormComponent implements OnInit {
testForm = this.formBuilder.group({
id: 1, // Id
name: 'My Name', // Name
comments: 'My Comments', // Comments
color: 'Blue', // Favorite Color
season: 'Spring', // Favorite Season
hobbies: this.formBuilder.array([ // Hobbies
false, true, true, false
])
});
colors = ['Red', 'Blue', 'Yellow', 'Purple', 'Orange', 'Green'];
seasons = ['Spring', 'Summer', 'Autumm', 'Winter'];
hobbies = ['Reading', 'Writing', 'Painting', 'Walking'];
constructor(private formBuilder: FormBuilder) { }
ngOnInit() {
}
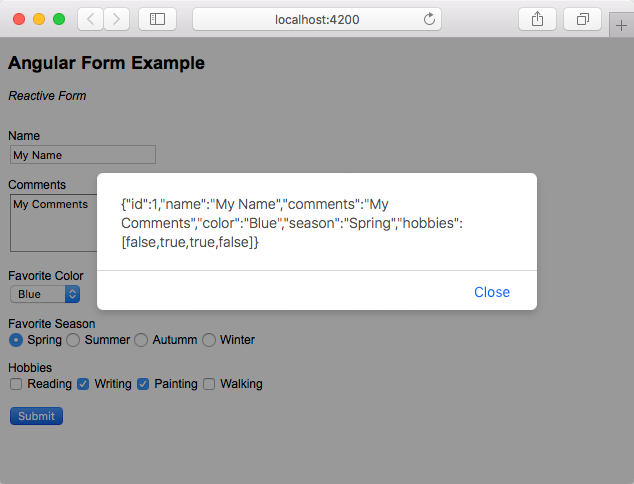
onSubmit() {
alert(
JSON.stringify(this.testForm.value)
);
}
}
src/app/test-form/test-form.component.html
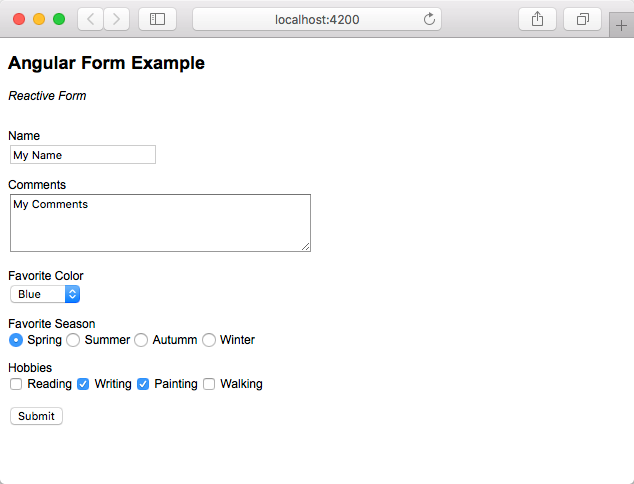
<h2>Angular Form Example</h2>
<div><em>Reactive Form</em></div><br/>

<form [formGroup]="testForm" (ngSubmit)="onSubmit()">

  <p>
    <span>Name</span><br/>
    <input type="text" formControlName="name" size="20" /><br/>
  </p>

  <p>
    <span>Comments</span><br/>
    <textarea formControlName="comments"
      cols="40" rows="4"></textarea><br/>
  </p>

  <p>
    <span>Favorite Color</span><br/>
    <select formControlName="color">
      <option *ngFor="let c of colors" value="{{c}}">{{c}}</option>
    </select>
  </p>

  <p>
    <span>Favorite Season</span><br/>
    <span *ngFor="let s of seasons">
      <input type="radio"
        value="{{s}}" formControlName="season" /> {{s}}
    </span>
  </p>

  <p formArrayName="hobbies">
    <span>Hobbies</span><br/>
    <span *ngFor="let h of hobbies; index as i">
      <input type="checkbox"
        value="{{h}}" formControlName="{{i}}" /> {{h}}
    </span>
  </p>

  <button type="submit">Submit</button>

</form>
Angular Main Module
Update Angular main module file, app.module.ts, to include our TestFormComponent, and
the ReactiveFormsModule functionality.
src/app/app.module.ts
import { BrowserModule } from '@angular/platform-browser';
import { NgModule } from '@angular/core';

import { ReactiveFormsModule } from '@angular/forms';

import { AppComponent } from './app.component';
import { TestFormComponent } from './test-form/test-form.component';

@NgModule({
  declarations: [
    AppComponent,
    TestFormComponent
  ],
  imports: [
    BrowserModule,
    ReactiveFormsModule
  ],
  providers: [],
  bootstrap: [AppComponent]
})
export class AppModule { }
Angular Main Component Html
Replace the content of Angular main component html file, app.component.html, with the following text.
src/app/app.component.html
<app-test-form></app-test-form>
Open the App
Now we can open the app with the ng serve command.
ng serve --open
The app will be open on the browser at the http://localhost:4000 location.
Check this app on Github here.
See a live demo here.
See this app on StackBlitz here.